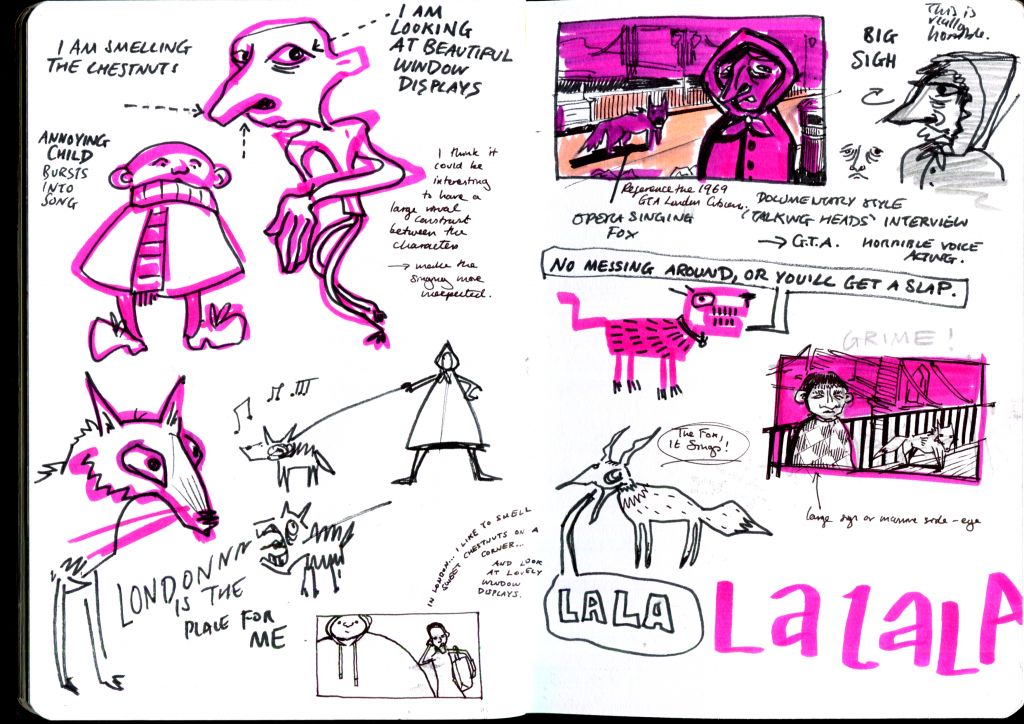
Sketchbook work – I listened to my audio several times and was drawing the ideas that came to mind. My favourite part of the audio is the sigh from my mum when my brother starts singing. Its barely audible but I can make it more expressive in the animation, similar to how the turtle going GULP in Creature Comforts was exaggerated in its action.
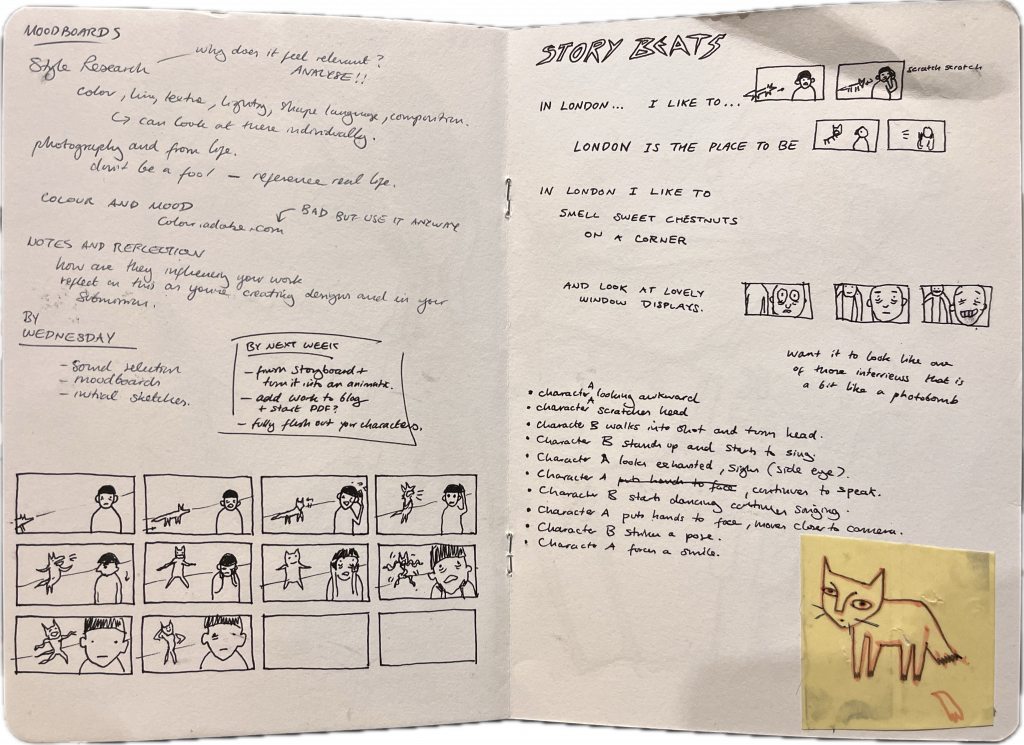
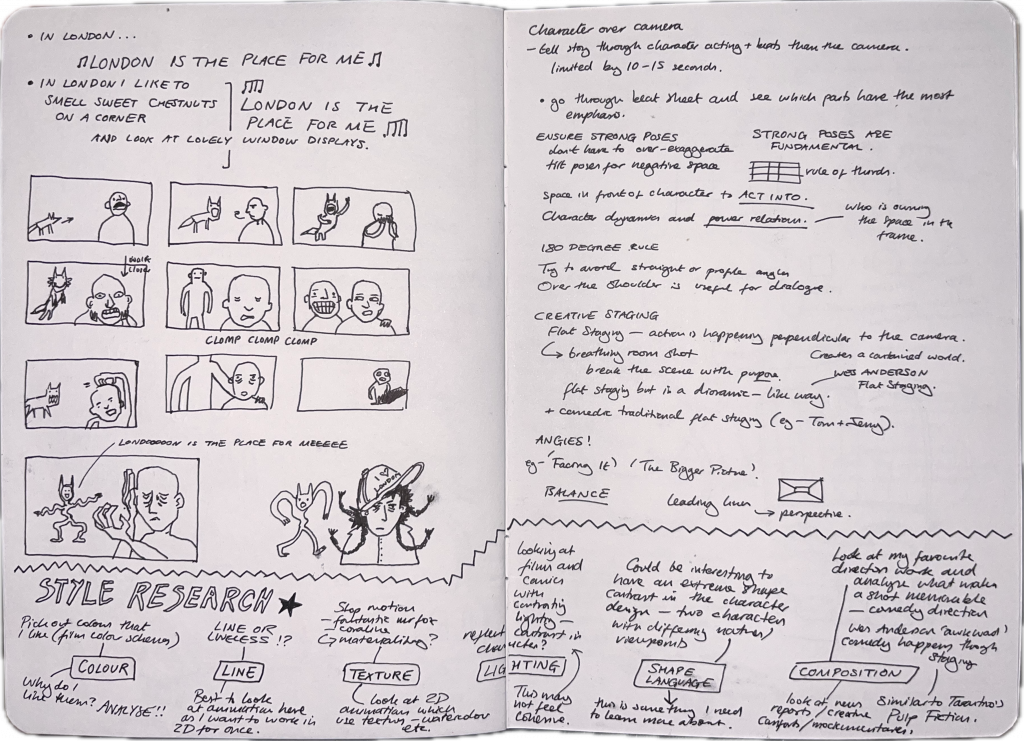
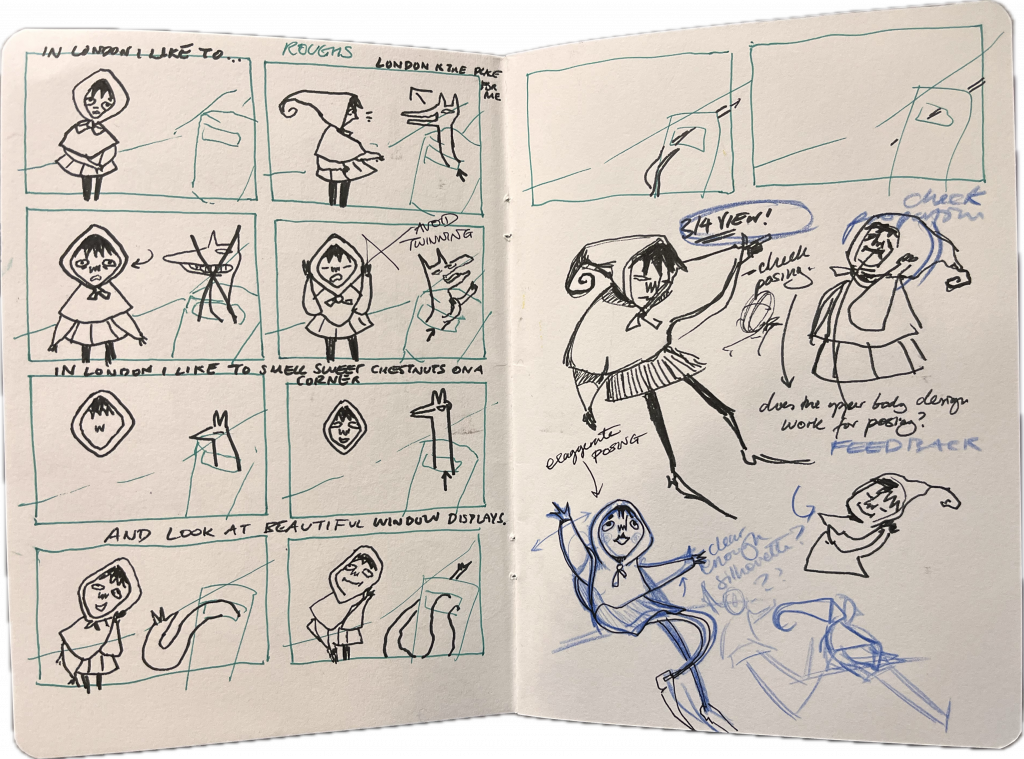
Thumbnails for my storyboard. I wanted to explore initial concepts in a low pressure way without using large panels. This enabled me to experiment with ideas – I used a placeholder character so that I could focus on composition. I began with wanting to use depth within the staging because I thought it would have a comedic effect if the second character popped into view in the background. My initial storyboards had this, but I used different layouts because I didn’t want to get stuck on the same idea. From doodles I did after the character design workshop, I started to develop my character design.


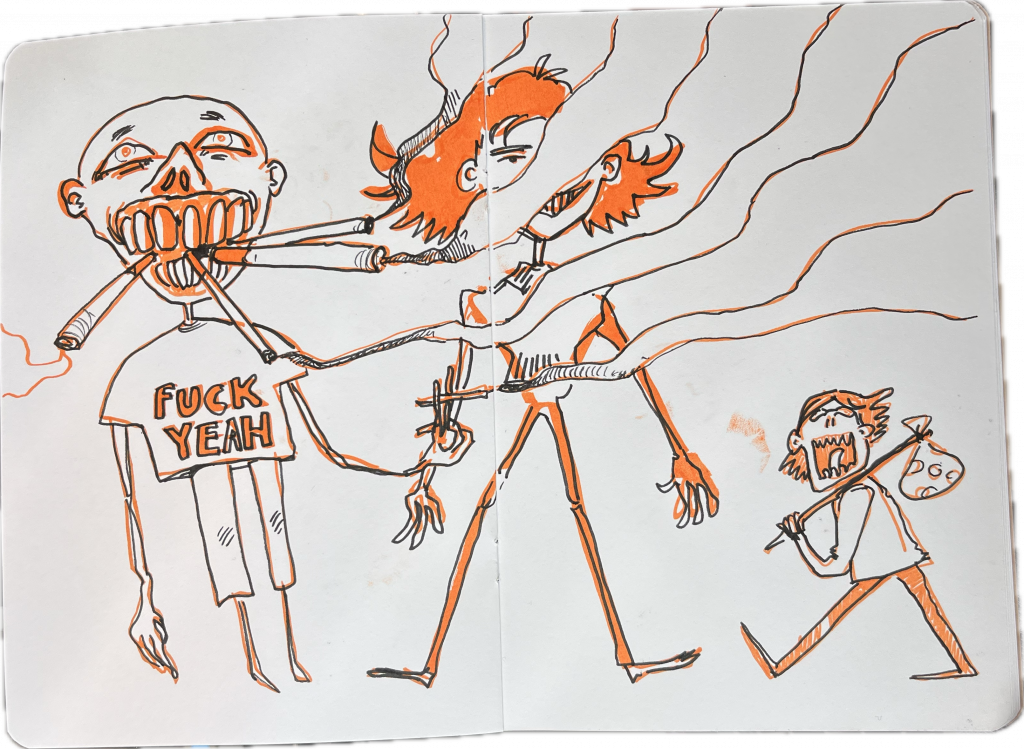
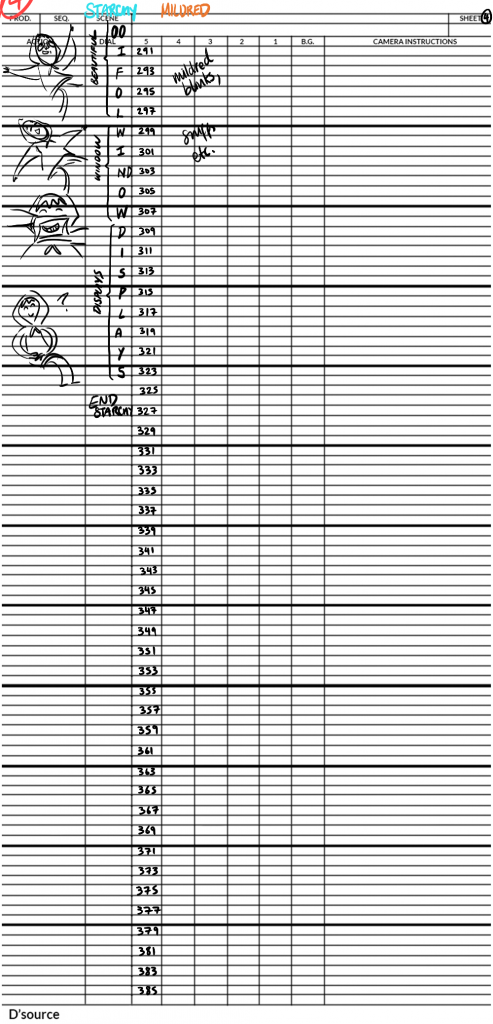
THE BIRTH OF STARCHY AND MILDRED
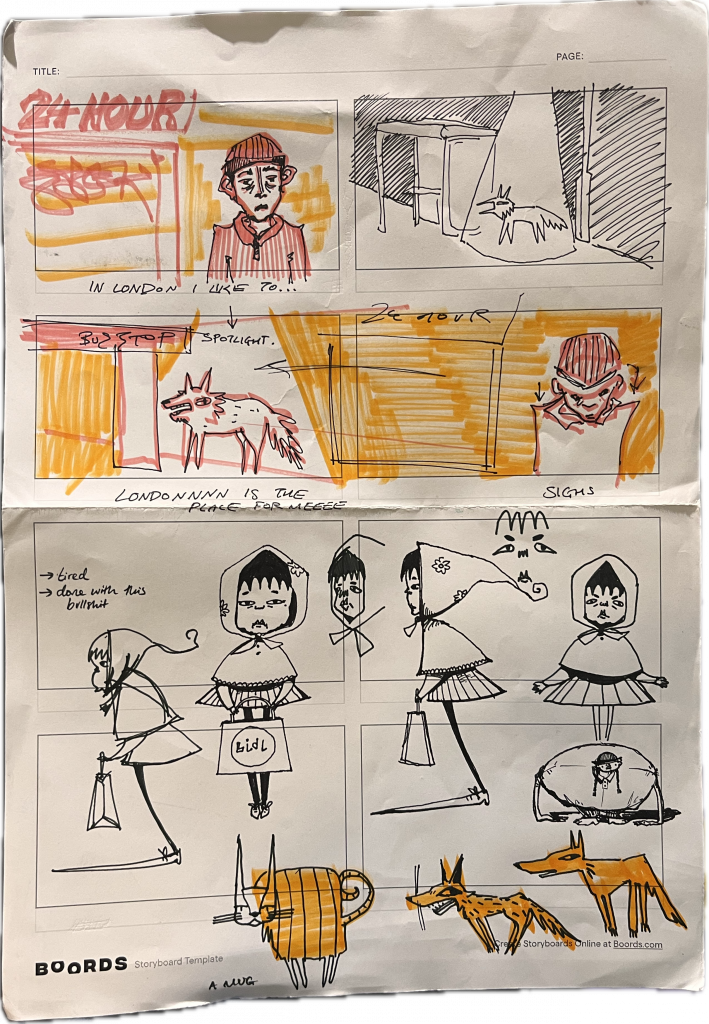
Working out thumbnail sketches – I had the idea of a fox popping out of the bin and annoying the passers by.
FEEDBACK – might be a lot of work to animate two complex movements. The solution was to remove the fox-worm slithering up the stairs, as this would have been too distracting, drawing the eye away from the main characters’ acting. I want to keep the focus on Starchy’s performance.
I also needed to finalise my storyboards, especially because the aspect ratio is not correct. When I come to do the final animatic, I need the aspect ratio of each frame to be 16:9.
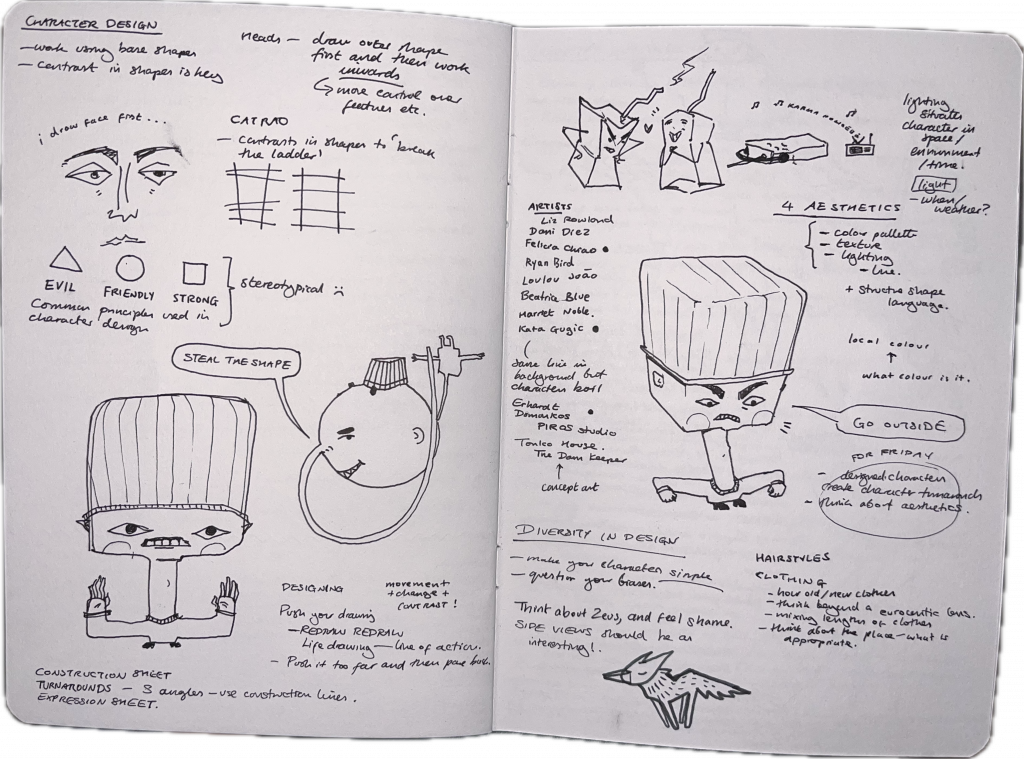
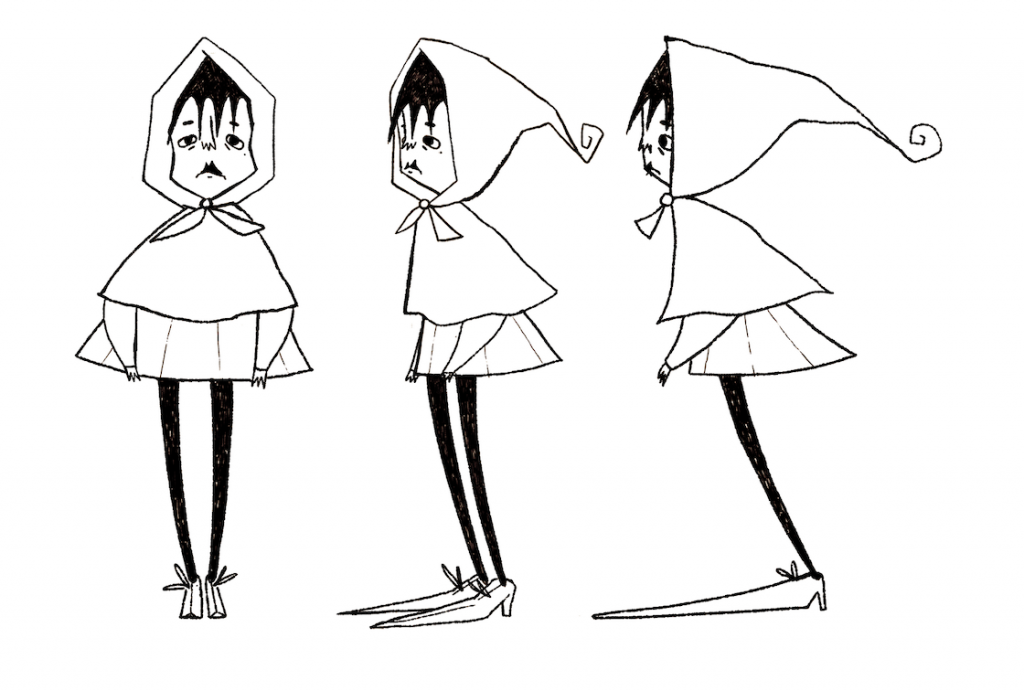
Next steps – digitise the storyboards to make them clearer. I will do this in Photoshop. Edits to make to turnaround – extend one foot to show it is a lot longer and extend back of head.
Rancid badger thumbnails.
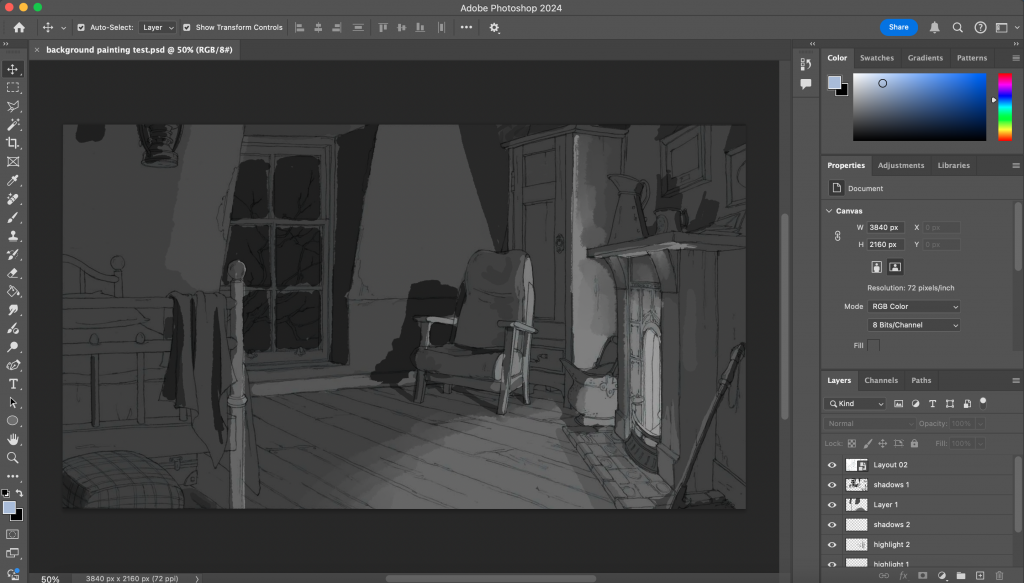
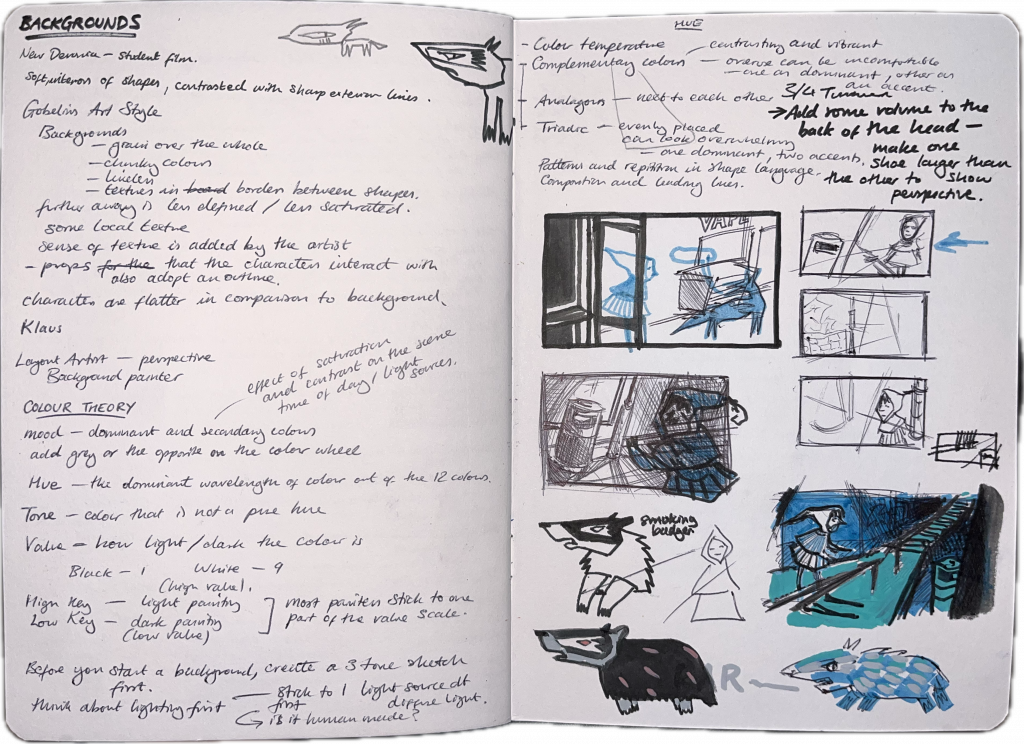
This excersise I found quite difficult because I had never attempted a value drawing before, so it was difficult to figure out how the light dispersed itself around the interior of the room, especially becasuse i made the light from the fireplace quite dim. Therefore, i started off with a background with a low value, and added in the lightest point (fireplace) and the darkest point (windows at night) and this gave me a good gage of where the intermediate values lay. I found this excersise to be very useful in terms of understanding how to approach a value sketch, and applied this to my later thumbnail sketches (shown above and below).
Strangely, I found that i had less control over the digital painting than i would if i had painted the background traditionally. I want to dedicate time to learning to digital paint, but i knew that this project was very tight on time so i opted to paint traditionally, which for me is faster.
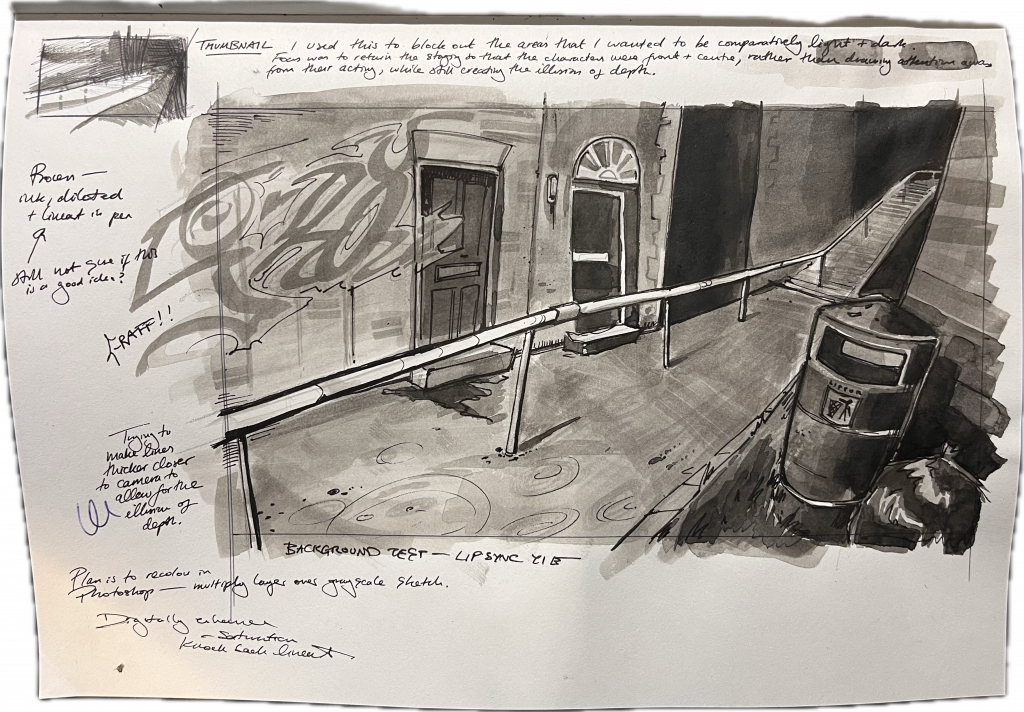
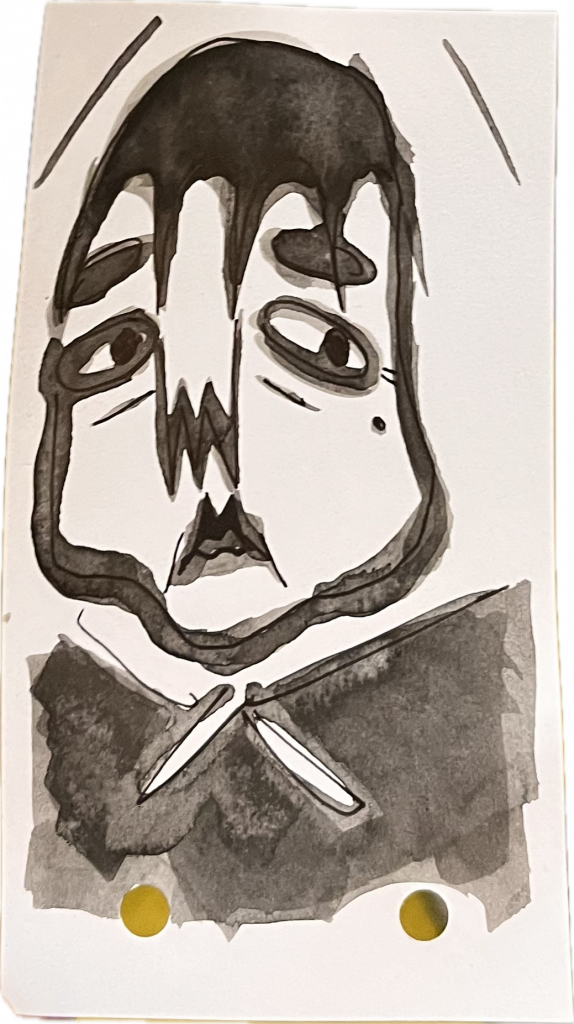
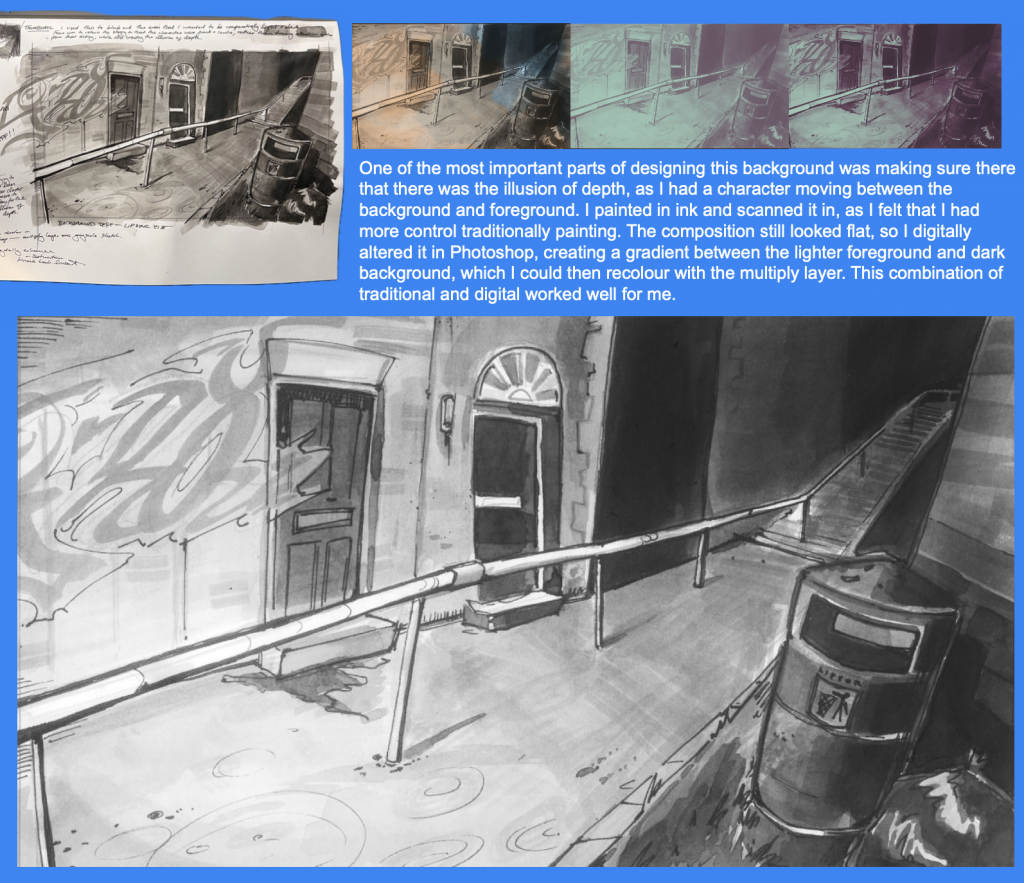
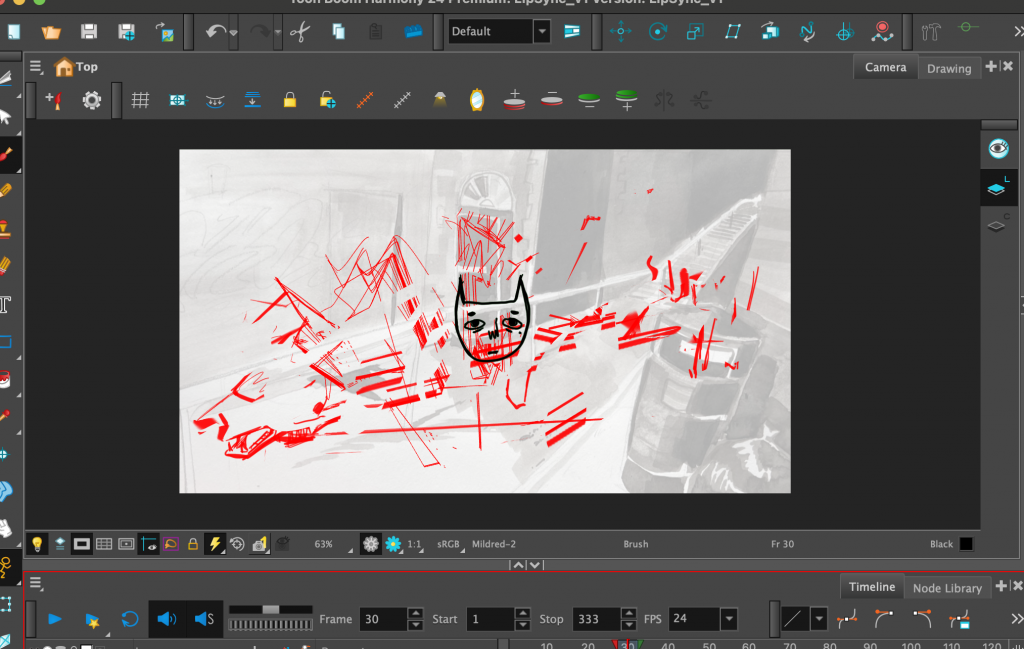
Background painting for lip sync animation – notes explain how i used diluted ink to block out my sketch and re-emphasised the lines with pen. I am still unsure whether the lineart is a pro or a con, as i think the drawing lost some depth when i added the lineart. I tried to counteract this by making lines appear thicker as they go towards the viewer, making sure to leave enough space for my character to fit within the frame.
Making a thumbnail for this process was very useful – it made me emphasise areas of light and dark to create this depth and contrast. I didn’t want it to look flat, as the fox character is going to move between the middle ground and the foreground.
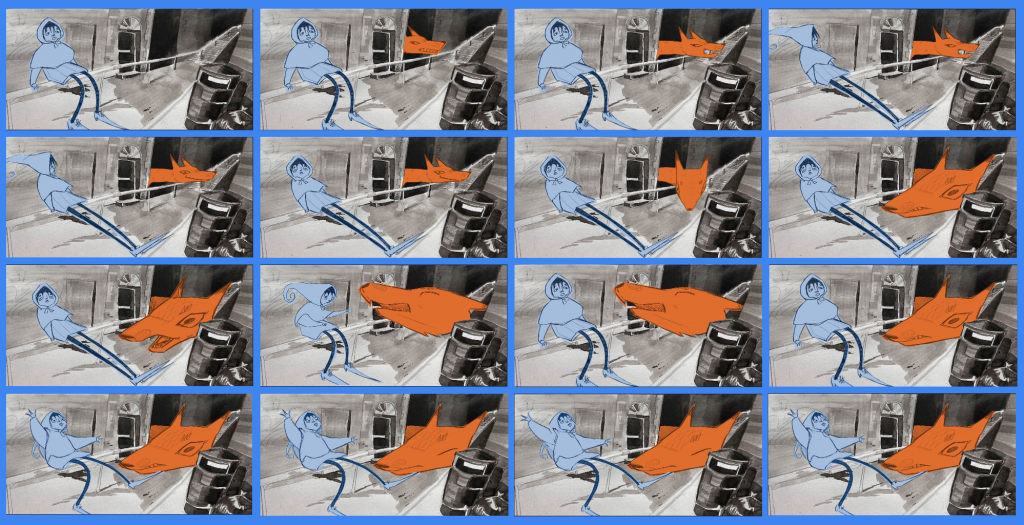
I made the assets for the animatic in Photoshop, exported as PNGs and ayered the PNGs of Starchy over the animatic with background that just contained Mildred. This was a good idea because it meant that I could time the actions more accurately than using a series of stills, as I kept forgetting where each action was meant to be.
I think that if I had refined this stage faster, then it would have saved me a lot of time later on. From the animatic my acting changed A LOT, and if i had thought more about the specific acting choices at this stage, i wouldn’t be making things up as i went along (which ended up happening during the actual animation stage, would not recommend).
But overall, i was very happy with the animatic! I think that it also helped me to establish the signature colours of the characters, as Starchy’s colour became blue from this point onwards. It also helped me to establish that my background actually worked for my composition, which was a massive relief!
Learning Toon Boom was kind of difficult, I found the learning curve steep but only at the start, mainly figuring out where things are and which tools to use for each drawing, but I found the interface very intuitive and I could see how it had been designed for the use of animators.
Although the work I made as a test was truly awful (I deconstructed a fox into a million pieces), I felt like I learnt a lot from this. The software was not as scary as I previously thought, having been gaslit by my foundation tutor.
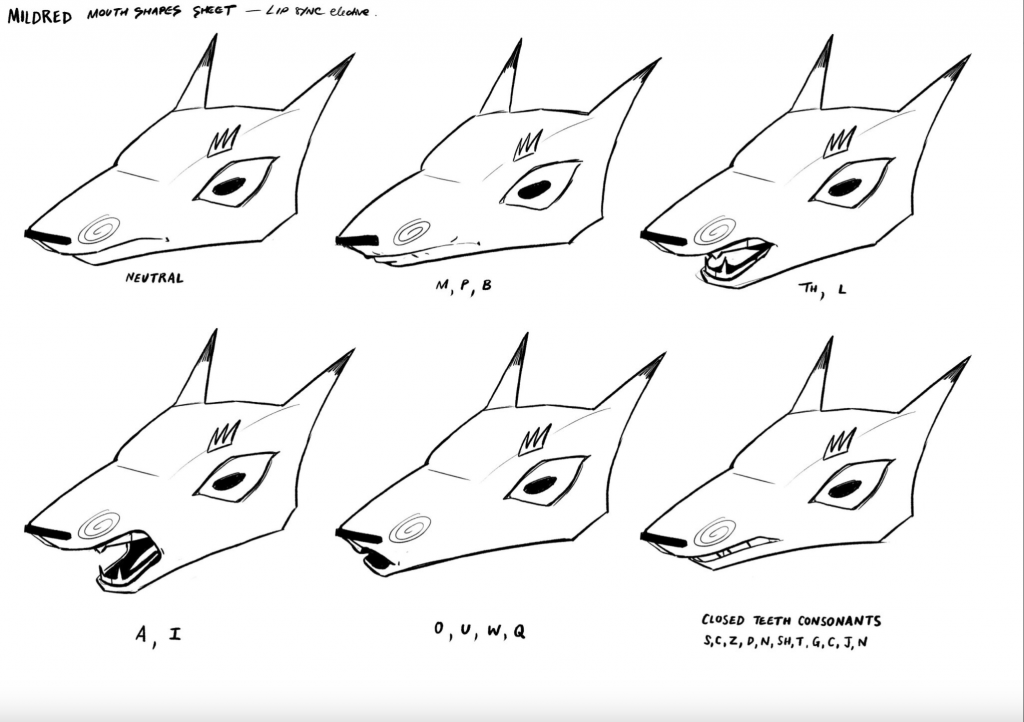
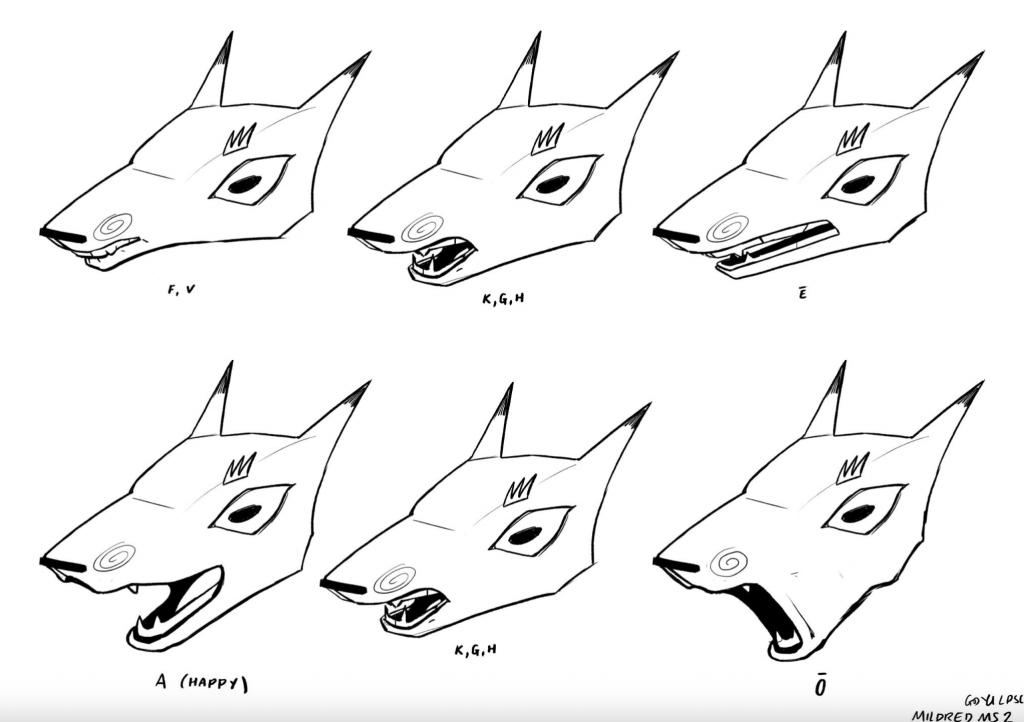
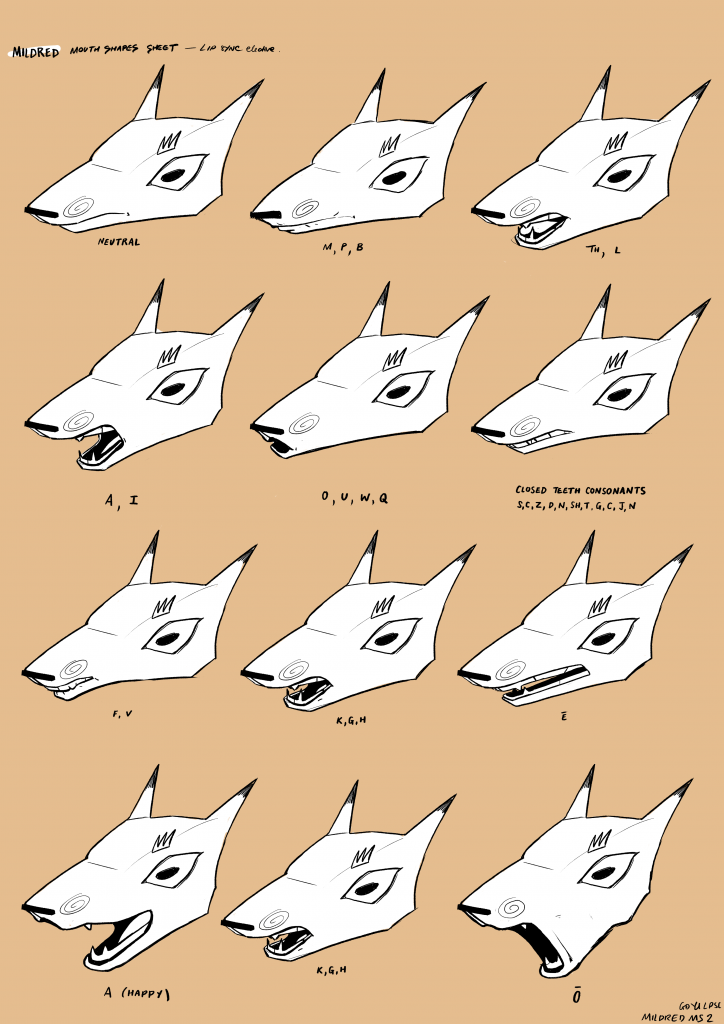
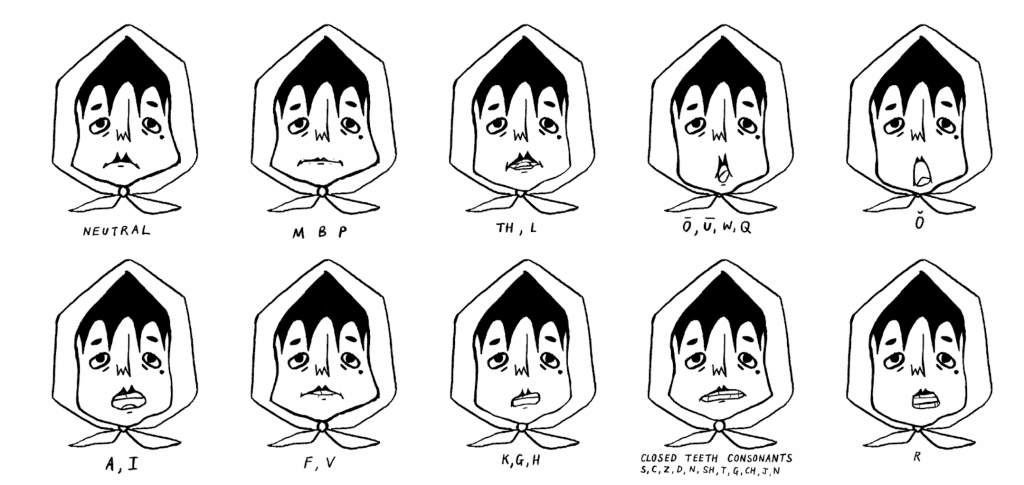
Mouth shape sheet for Mildred
In doing this, I realised that I needed to create two different mouth shape sheets for the two different angles that the character is presented in. One is a side profile from far away (simpler design) and the more complex was the 3/4 view medium shot. I still needed to add more detail because she becomes comically large as she worms her way round the corner (this was intentional).
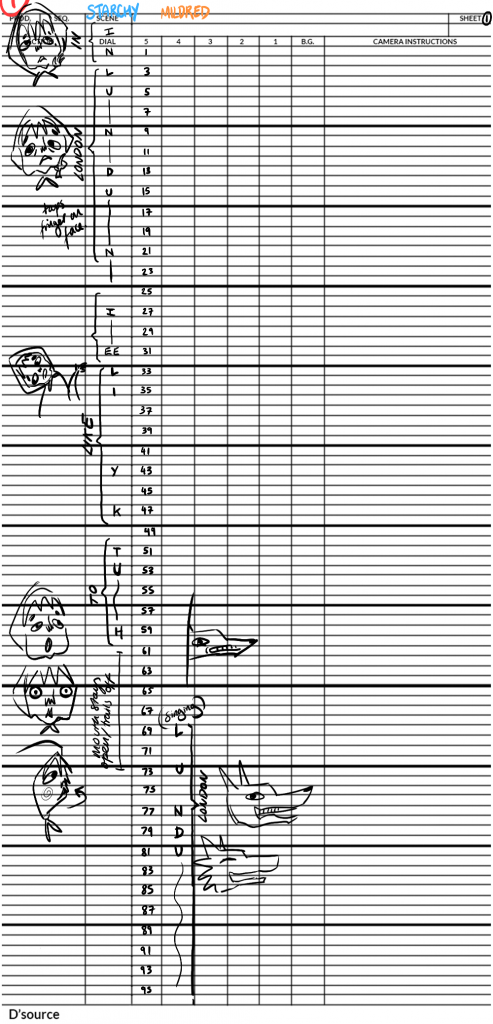
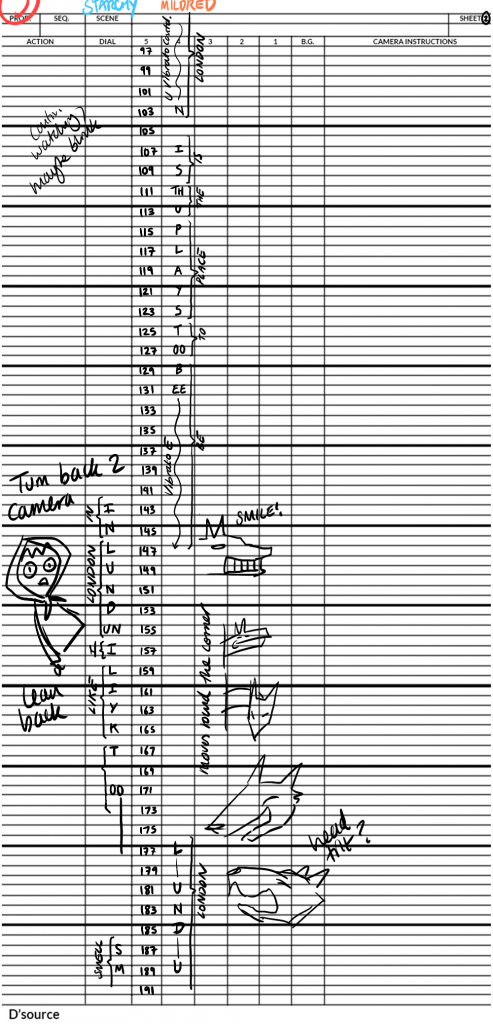
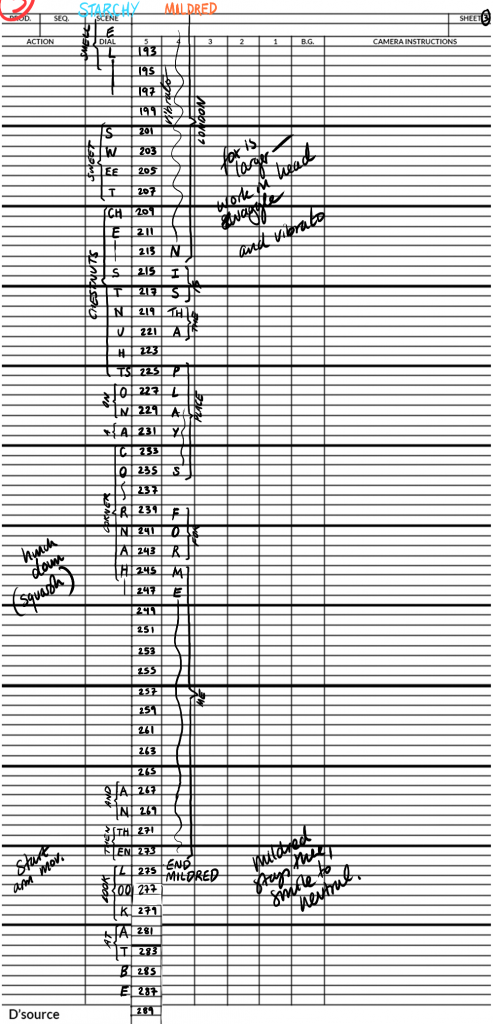
X-SHEETS were surprisingly fun to make, I loved working out which sounds were being made by sitting scrubbing through the audio and making strange shapes with my mouth.
However, this took me AGES! This is definitely something to note for the future, because it turns out that I get really confused really fast over which frames im writing on, and which sounds to prioritise. I think this is definitely something that will get easier with practise, but it was very satisfying to see the end result. I used one sheet for both characters, but I probably should have written them in different colours because I don’t want to get mixed up when it comes to animating.
TASK 1
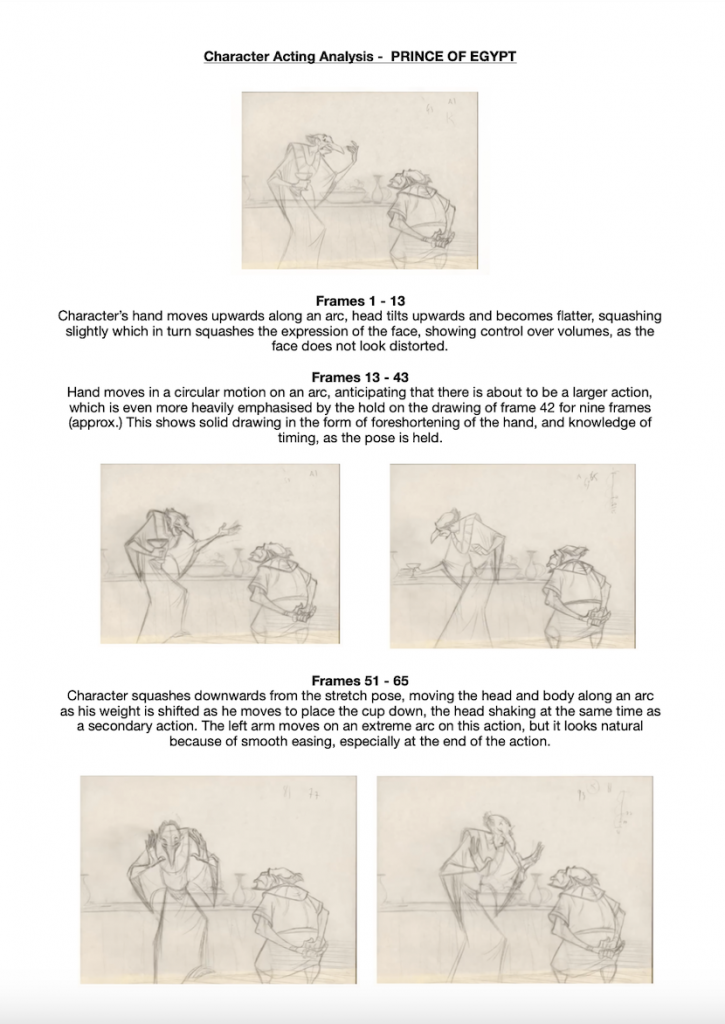
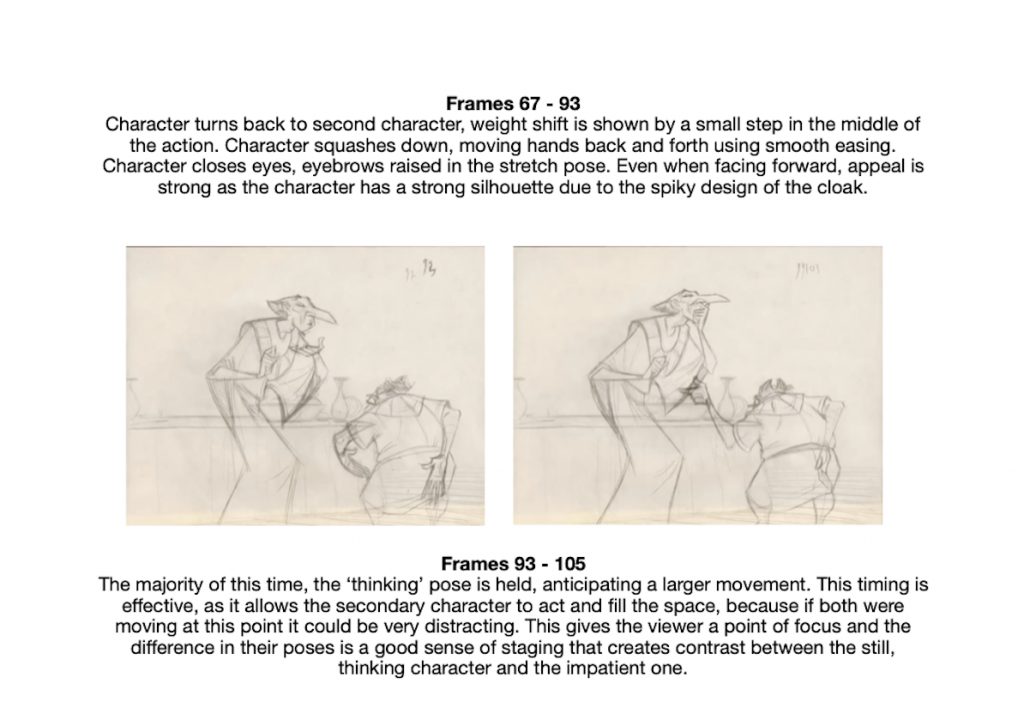
Dreamworks character acting study task, Prince of Egypt
TASK 2
- Have a look at your storyboard/keyframes, and choose a couple of keyframes that might need a dynamic movement – this could be as simple as a head turn, or it could be a bigger action like a jump or a kiss or a reaction to something else.
- Make a list of what considerations you have for these thinking about principles of motion (how to communicate the physics, materials and forces in your world), and principles of emotion (how to act through your character to connect emotionally)..
- Consider how you can strengthen what you have already using this list.
- Create timing charts for the keys, to reflect what you have decided in regards to easing.
A dynamic movement in my keyframes is when Starchy raises her hand, leans forward and then leans back again, raising her arms in the air.
considerations for principles of motion (+ improvements)
- As she leans forward, I will need to consider follow through of her fabric tie around her neck, this should sway as if it is a pendulum, I want this swing to be over-exaggerated becuase it is made out of a heavy fabric that keeps its shape.
- I will need to make sure that her weight on her feet doesn’t shift too much – i dont want her feet to look like they are sliding around.
- She will need to squash down slightly before the large movement at the end of the action (when she raises her arms). This will create contrast in the movement and will ensure she doesn’t look too robotic.
- I can have large gaps between frames here with most of the easing at then end of the action, this is because the movement will be very fast and if it has too many frames it will be a slow action and I think this would look too anticlimatic.
- As she leans forward, I will need to consider having a slight overshoot. So far, I have been making my overshoots too subtle and this makes the easing too even. I think that exagerrating the overshoot and the suash before the stretch in the action will fix this issue.
considerations for principles of emotion (+ improvements)
- Before she outstretches her arms at the end, her voice has been very weary and tired, I want to express this through her body language being slow and tired, and her facial expressions being slightly drowsy, drawing her eyes droopy.
- I want to contrast this at the end with a happier experssion, which means that as she is still talking I may have to create a mouth shapes sheet that is focused on a smiling mouth, as up until this point she has been sad/neutral.
- She sounds happier towards the end of the audio because shes is talking about something she likes, smelling sweet chestnuts on a corner, whatever that means, so the action will become speedier as she gets more excited.
TIMING CHART and easing

____ PROJECT EVALUATION – LIP SYNC ___________________________________
I found the research phase to be useful because it allowed me to think about the vision that i had for my audio. I wanted to have a single shot because I really enjoyed the comedic effect of this in Aardman’s creature comforts short, so I wanted to take an approach that looked like an interview. I think that this worked well with my audio. When the fox interrupts my character Starchy, I wanted this to be surprising, so I utilised the composition of the frame to have the fox appear out of an alleyway. On reflection, coming up with this concept took me so long that i lost a lot of crucial time on the storyboarding stage, as I had many different iterations drawn out of the same idea. Even though this process took me a while to work out visually, I think that it was necessary as I was very happy with my composition at the end of production. Designing the background was also a key part of this, as I wanted to create depth that the characters could move throughout. I made the background through a combination of traditional and digital processes, which was an approach that worked well for me – I could have control over materials and then digitally alter it in Photoshop. Learning Toon Boom was difficult at first because it took me a while to get used to the Wacom. However, it wasn’t as terrifying as I thought and it ended up being quite intuitive. I found keeping track of all the X sheets and the mouth shapes sheet difficult, so I ended up printing everything out and sticking bits of paper to my computer. The animation itself I found challenging, especially because I changed my character design to make it more easily animated in 2d – I had drawn the model sheet as if i was going to be making a stop motion puppet. This lead to some of my keys being off model and if I was to do this again, I would have implemented timing charts more as I only began to use them closer to the end, and then realised how useful they were for keeping track of how my characters move. However, the lip sync itself was satisfying, I think that the mouth movements match the audio well and look believable, and animating follow through on Starchy’s tie was my favourite part. I found the process of inbetweening to take the longest, but the process was rewarding and I was super happy with the way that my characters look when they interact with each other – I think that their different personalities come across well both in the animatic and the final animation. I attribute this to the research that I did while analysing the character acting from the Prince of Egypt, which enabled me to break down the subtleties of character acting. If I was to animate this again, I would have pushed my keys further to have more exaggerated movements, because I think a lot of the acting in my animation was more subtle than I intended. Over all, I was very happy with my final outcome and my process as a whole. ToonBoom was a learning curve for me but I am excited to use it in the future, and to finish my coloured animation for my portfolio.